Tuesday, Sep 15, 2026
# Chris's Guide to Sleeping Bags
Good sleep is important, especially when you're adventuring outdoors. I'll cover how to choose a sleeping bag, how to take care of it, what add-ons you may want, and explain my own sleep system.
What is a sleeping bag?
A sleeping bag is a quilt that is sewn or zipped closed on the edges to form a pouch that surrounds your body and keeps you warm on all sides, even as you move around in your sleep.
When do I need a sleeping bag?
You will probably want a sleeping bag when you sleep outside in temperatures ranging from warm to very cold. Remember that air temperature dips at night, typically reaching a low point between 03:00 and 05:00, and your body temperature also drops when you sleep.
If the nighttime low temperature is hot—above 80F / 27C—I recommend a sleeping bag liner with a quilt or cotton blanket. You will not want to be inside a sleeping bag at this temperature, and even lying on top of or against a sleeping bag will feel very sweaty.
# Bag Shapes
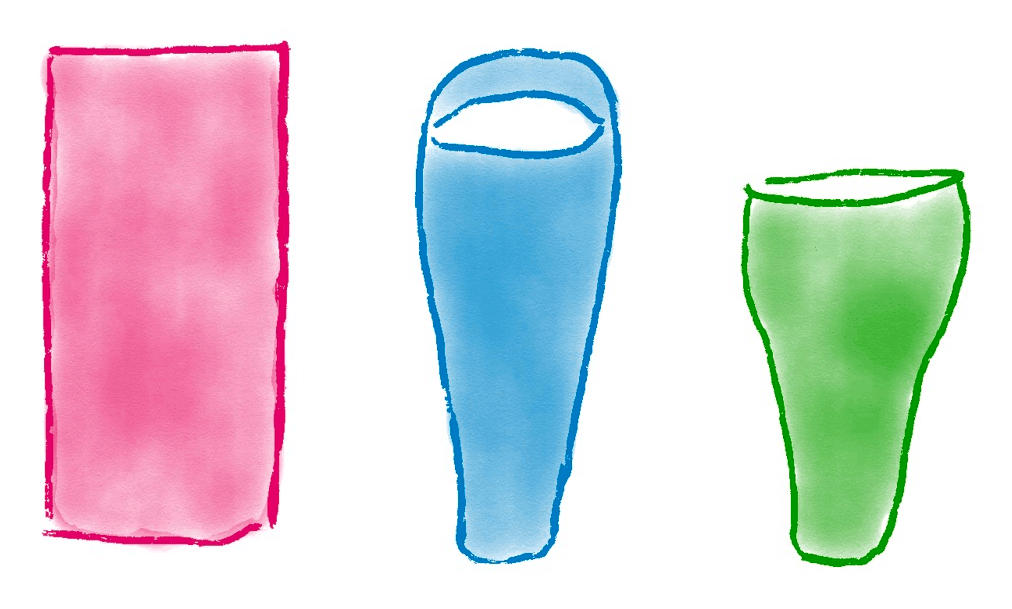
Rectangular or quilt bags take on a bag form but can also unzip and lay flat to be used as a blanket. In cooler weather you will notice that rectangular bags leak air and have cold spots, since they do not cinch around your shoulders or feet. However, rectangular bags feel less constricting. If you have two of the same bag you can typically zip them together to make a single, large sleeping bag.
Mummy bags are narrow around the feet and legs and have a small opening that can be closed tight around your face. They keep warm air inside the bag and against your body, avoiding cold spots, and are ideal for cold temperatures. Mummy bags feel constricting and it may take some time to get used to sleeping in one fully zipped.
Mummy bags are the most common type of bag you will see outdoors.
What's the difference between a camping quilt and a sleeping bag?
Many outdoor companies sell both quilts and sleeping bags for camping, and the differences are subtle. Quilts cinch or zip closed at the foot end, rather than being stitched closed, so they can be opened and laid flat. They may use snaps or ties instead of a zipper on the sides.
Quilts provide a great deal of flexibility since they can be used as a sleeping bag, blanket, shawl, poncho, or under a hammock. They also weigh less. They may not provide the same level of heat retention as a mummy bag, especially around your feet and shoulders.
I'm worried a mummy bag will feel too claustrophobic.
This is real! When it is cold, though, you will feel very cozy inside. In moderate to warm weather I leave the top of my bag unzipped so my arms can move freely. Select a bag with a left or right side zipper to maximize your comfort. Invite a friend to sit with you while you practice zipping yourself in and out so you can comfortably exit your bag solo.
What about the secret third option?
Less common bag shapes include zipperless bags, bags for two people, convertable quilt/bag hybrid things, and more.
# Finding the Right Size
You can find wider or longer sleeping bags for different body sizes and shapes. Often, the same style of bag is offered in different sizes. Getting the right fit ensures that your bag will maximize heat retention and keep warm air close to your body without feeling constricting.
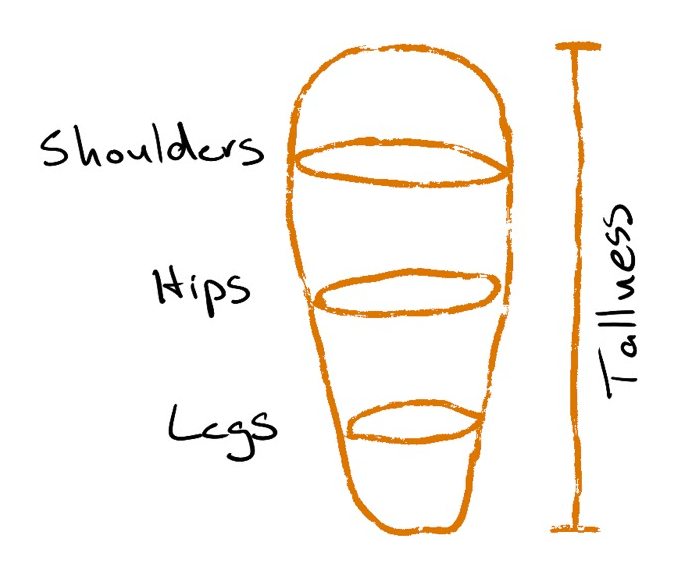
The best way to see if a bag fits is to try it at a store. At a minimum, you should be able to cross your arms over your chest while inside the bag, since this is how you'll reach the zipper. Next, stretch out and make sure you can fully extend your legs and spine comfortably. For rectangular bags, you should not slide out of the bag when you do this. For mummy bags, even with the hood on, you should not feel like you are stretching against the bag with your head and feet. Finally, try rolling onto your side. You may find you need more space for your legs or hips to sleep comfortably.
If you plan to use a pillow, it is helpful to try using it in the bag to make sure it fits. Once you have an idea how a bag fits you can use those measurements to shop online for a different size or style.
If you borrow a bag that is too large, or buy a larger bag for your child to grow into, you can use a hair scrunchy or belt to cinch off the bottom part of the bag and avoid cold air by your feet.
# Insulation
Insulation, or "fill," is either down (feathers) or synthetic material (polyester). At a glance:
- Goose down - Very expensive, very light, packs small. When wet, goose down insulates poorly and has a mild smell.
- Duck down - Moderately expensive, very light, packs small. When wet, duck down insulates poorly and has a strong smell.
- Synthetic - Moderately to less expensive, heavier, bulkier, performs O.K. when wet, no smell
Down is generally preferred except in high moisture environments. Down clumps together when it is wet, and retains significantly less heat when this happens. Synthetic fill is less impacted by moisture. If you will be adventuring in sub-freezing temps or jungle, you should use a down bag treated with durable water repellent (DWR) or a synthetic bag.
What if I have a down allergy?
Down allergy is rare, but you can always use a synthetic bag if you are unsure. Many people suffer from dust and pollen allergies, which can accumulate in down when it is not thoroughly cleaned. Synthetic bags are often easier to keep clean. You can also use a liner.
Why are down bags so expensive? Why does anyone buy these?
Down bags weigh less and pack smaller than synthetic fill for the same level of warmth. Expensive, ultra-light gear makes sense when you are carrying it over long distances. If you are car camping, or your overall gear load is light, you don't need an ultra-light bag.
How do I prevent my bag from getting wet?
Use a rain cover for your pack, and use a dry bag or pack liner inside your pack to keep essential gear dry. You can also use dry bags to isolate wet gear inside your pack. When sleeping in your bag, wear socks, long pants, and long sleeves, and use a sleeping bag liner to reduce sweat.
You can buy bags treated with durable water repellent (DWR), or buy DWR to apply to your bag. Most often, the shell is treated with DWR and the fill is not. Beware that some types of DWR contain PFAS chemicals, which are toxic. A water repellent bag may be required in sub-freezing temperatures since it will be impossible to dry in the field if it gets wet.
What is "fill power?"
Many down manufacturers refer to "fill power". Fill power refers to how much down expands after you squash it. A higher number means you can use less down to stay warm. However, higher fill power also costs more. 900 fill power down is premium and expensive.
# Temperature Ratings
Sleeping bags contain different amounts of fill (insulation) to keep you warm in different temperature ranges. More fill means more warmth, but also more weight and bulk. Especially for down bags, the amount of fill is the primary factor in the bag's price.
Manufacturers provide ratings to help you choose how much insulation you get in your bag. Look for "comfort" vs. "limit" ratings. A bag with a "comfort" rating of 0 degrees means you will feel warm in the bag at 0 degrees. A bag with a "limit" rating of 0 degrees means you won't freeze to death at 0 degrees (probably) but you will feel very cold. Beware that a bag named "Expedition 20" does not necessarily reflect its rating.
Even with ratings, there are many factors that determines how warm a bag will feel.
-
Personal factors include how warm you are when you sleep, what you ate, and what clothing you wear inside your sleeping bag. Sharing a tent with another person will keep you warmer, even if they are in their own sleeping bag.
-
Equipment factors like your choice of sleeping pad, sleeping bag liner, tent size, and use of rain fly influence temperature.
-
Environmental factors like humidity, rain, wind, ambient temperature, and where you sleep will affect how warm or cold you feel.
A single sleeping bag can adapt to different environments—you can unzip your bag if it's too warm or add clothing layers like gloves, hat, and jacket if it's too cold. Plan to test your sleep system in a variety of environments to learn how it performs warm, cold, windy, or wet weather.
If you would like to read more about ratings, specifically, REI explains in detail what sleeping bag temperature ratings mean.
# Cleaning Your Sleeping Bag
Check the manufacturer's recommendations for cleaning your specific sleeping bag or bags. Most bags can be machine washed warm/cold and machine dried on low temp, with some caveats. Most manufacturers recommend using larger, commercial-sized washing machines and driers.
Tip: If you use a liner to keep your bag clean, you won't need to wash it as often.
# Detergents
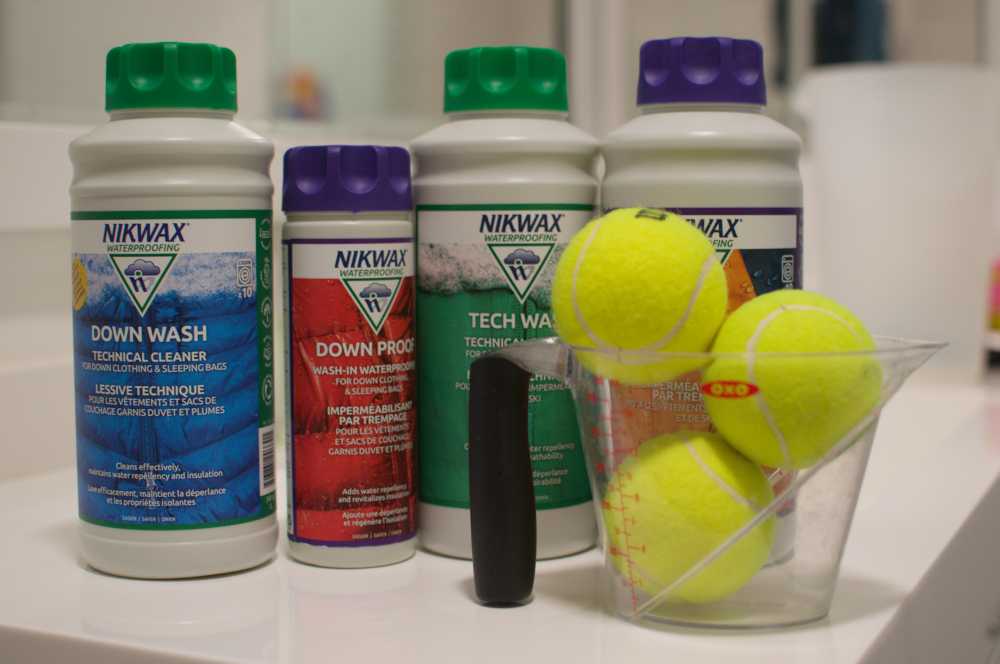
Use down-specific wash such as Nikwax Down Wash, Gear Aid Revivex (formerly McNett), or Granger's Down Wash for down bags. Some synthetic bag manufacturers recommend tech wash instead of laundry soap. Do not use regular laundry soap for down sleeping bags.
I measure out Nikwax using a measuring cup that I only use for Nikwax. When washing in the bath tub I measure out 10 gallons of warm water and a proportionate amount of Nikwax down wash. When washing in a machine, I pour the detergent directly into the drum.
Why do I need special down wash?
Down feathers contain natural oils which provide water repellency and loft. The wrong detergents will strip those oils and compromise the down's performance.
# Washing
I hand-wash my down bags in my bath tub using Lehman's "breathing washer". I put my synthetic bags directly into my washing machine. Use a gentle / delicates cycle and do not use a washing machine with an agitator (commonly found in top-loaders). It's easier to start washing if you take your bag directly out of its stuff sack so water can penetrate before it fills up with air. Rinse twice if washing by hand, or use an extra rinse cycle on your laundry machine.
Your sleeping bag will be thin and lumpy after washing. Don't worry! It will fluff up again when it's dry. Use the spin cycle on your washer, if you can, to remove water before drying.
# Drying
After removing as much water as possible mechanically, dry on low heat (again, delicates setting). Add 2-3 tennis balls to the drier when drying your bag to break up clumps of down (works for down garments, too!) or restore loft in synthetic insulation.
Properly drying a sleeping bag takes several days. Seriously! After mine has been in the drier for several hours and seems dry, I hang it on a drying rack with a fan blowing on it to completely air dry for 2 days! If your down bag smells bad after washing it, it's probably not dry yet. (If your synthetic bag smells bad after washing it, it's still dirty.)
If you need to re-apply DWR, do so only after your bag has been cleaned and thoroughly dried.
# Storage
Make sure your sleeping bag is clean and completely dry before storing it. As noted above, this can take several days. Store your sleeping bag in a breathable cotton or mesh bag (a king-sized cotton pillow case can work), in a dry place away from sunlight. Avoid air-tight containers.
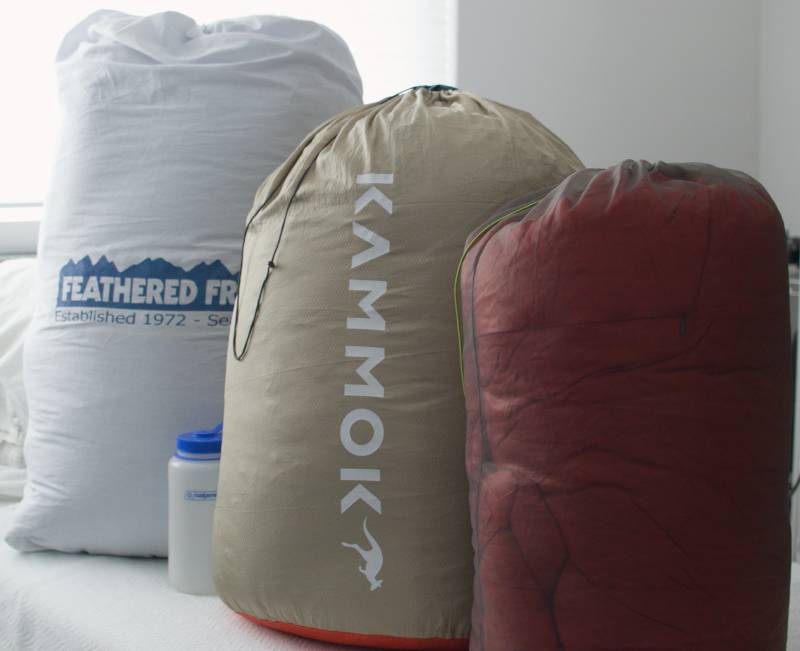
Store your sleeping bag uncompressed. Especially with down, do not use a stuff sack or compression sack for long-term storage. Storing the bag compressed will crush the insulation, and later it will not expand to keep you warm.
# Where to Buy?
It seems like every outdoor company sells sleeping bags these days, so you have dozens of options to choose from.
I try to buy gear made in the U.S. For sleeping bags, that means Feathered Friends, Go-Kot, Kifaru, Warmlite, Western Mountaineering, Wiggy's, and Zpacks. Englightened Equipment makes bags in the U.S. for custom orders only.
European manufacturers include Cumulus Equipment, Nordisk, and Rock Front.
Look carefully since different product lines from the same manufacturer may be made in different countries, and these change over time. If you're not concerned with country of origin, you can choose from many other brands including ALPS Mountaineering, Big Agnes, Cedar Ridge, Coleman, Exped, Kammock, Kelty, Mammut, Marmot, Mountain Hardware, NEMO, North Face, Peregrine, Rab, REI Co-op, Rumpl, Sea to Summit, Slumberjack, and Therm-a-Rest, to name a few.
# Add-on: Sleeping Bag Liners
Sleeping bag liners are an optional add-on for your sleeping bag which provide a fabric layer between your body and the sleeping bag. Liners reduce sweat build-up and keep your sleeping bag cleaner. In warm temperatures, you can sleep in the liner by itself and use your bag as a quilt. In colder temperatures, the liner adds warmth to your sleeping bag. Liners are easy to clean.
I recommend using a liner.
Sleeping bag liners are made of different materials such as cotton, polyester, silk, and merino wool. These materials offer different warmth, weight, moisture wicking, and price characteristics. I am most familiar with liners made by Cocoon, but you can buy them from other companies, too.
In dry weather, a liner can cause static electricity build-up as it rubs against your bag, especially when getting into or out of your bag. Be prepared to discharge the static so it doesn't damage gear or your companions.
# Add-on: Sleeping Pads
Sleeping pads are an essential add-on for your sleeping bag which provide padding and insulation from the ground. Even with a sleeping bag, the insulation below your body gets compressed when you lie down, resulting in more heat loss. And sleeping on the ground without padding is generally not comfortable.
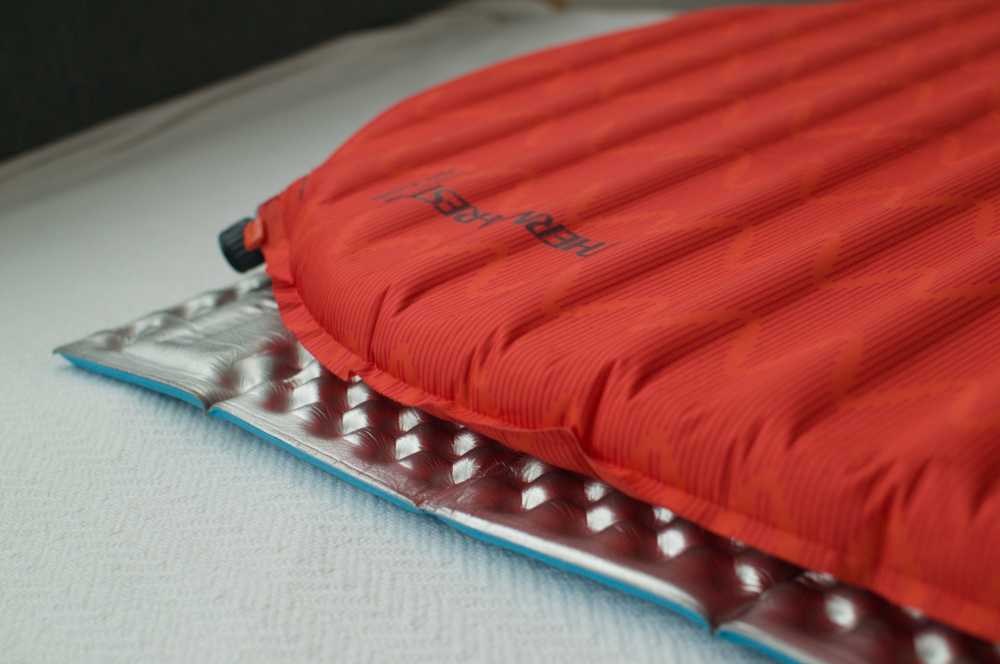
There are three types of sleeping pads:
- Foam pads (which I call z-pads) such as the Thermarest Z Sol or Nemo Switchback. Very light, cheap, but bulky. Deployed in seconds.
- Inflatable pads such as Thermarest NeoAir, Exped, and Nemo Astro. These are extremely light and compact. Deployed in a few minutes.
- "Self-inflating" pads which combine foam and inflation. These are heavier and bulkier than inflatable pads, and can take a long time to setup.
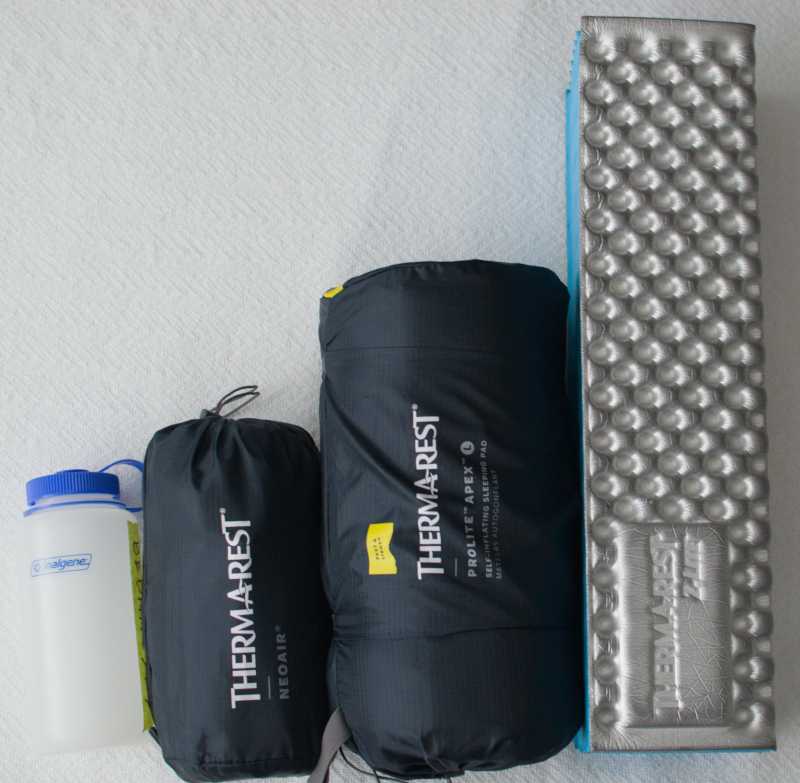
Sleeping pads add warmth to your sleep setup, and some are designed to provide more insulation. R-value is used to indicate how warm a pad is, with 1 being a warm-weather pad and 7 providing much more heat retention.
Beware that some sleeping pads designed for car camping are significantly larger and heavier, and may require electricity to inflate. If you are buying something for backpacking make sure you get an appropriate pad.
Should I use a foam pad or inflatable pad?
Foam pads are very easy. They can't pop or leak and take only a few seconds to setup. Some hardcore backpackers swear by them. However, foam pads are bulky and don't provide much support for people who are heavier, have wider hips, or sleep on their side. My experience is that adults generally prefer sleeping on inflatable pads. Children can't be bothered to inflate them and generally seem fine with foam pads.
I use both: a foam pad on the ground, and an inflatable pad on top. The foam pad protects my inflatable pad and my tent floor from pointy things like tree roots, rocks, and seed pods. If I need to pack light or save space, I take my inflatable pad only.
Which side of the foam pad goes up?
The reflective side of the pad should face your body to reflect your body heat back to you.
How do I inflate my pad?
Just about any pad can be inflated by blowing, but you can also buy a battery-powered pump or a foot pump. Some pads have built-in pumps, or include a pump sack, which looks like an extra bag. Pumps sacks are lightweight and don't rely on electricity but take some practice to use. It's a good idea to inflate your pad at least once before you leave home to make sure you know how.
See how to inflate a pad using a pump sack.
What about self-inflating pads?
Self-inflating pads contain compressible foam which slowly expands after you unpack it. They are larger and heavier than inflatable pads. After the foam expands you will need to blow or pump to reach the desired firmness.
Just like a sleeping bag, you should leave a self-inflating pad uncompressed for long-term storage so the foam is not crushed over time. Z-pad foam and self-inflating foam are different, so a self-inflating pad does not become a z-pad if the air seal fails.
Should I get a mummy-shaped pad for my mummy bag?

I prefer a rectangular pad because I'm less likely to slide off it while I'm sleeping. However, tent floors come in various shapes such as rectangular, hexagonal, or trapezoidal. You may find that you need a tapered or rounded pad to fit your tent, especially if you want to fit multiple pads side-by-side. If you are really counting ounces, mummy pads will probably weigh a bit less.
Why does my pad feel deflated at night?
Air expands when it is warm and contracts when it cools down. If you setup your tent during the day it is common to find your sleeping pad has "wilted" when you come back at night to sleep. This is normal. Just add a bit more air before you sleep.
Inflatable pads expand during the day as the temperature rises. To prevent your pad from bursting, partially deflate it or leave the valves open if you are going to leave it in your tent or vehicle during the day.
I recommend packing / storing your inflatable pad with the valves open, especially if you are flying.
# Add-on: Pillow
You will probably want a pillow to support your head and neck when you sleep. One option is an inflatable camping pillow with an extra garment as a pillow case. Ultra-lite people use a rolled-up puffy jacket or other garment. If you are car camping, you can bring your usual pillow from home.
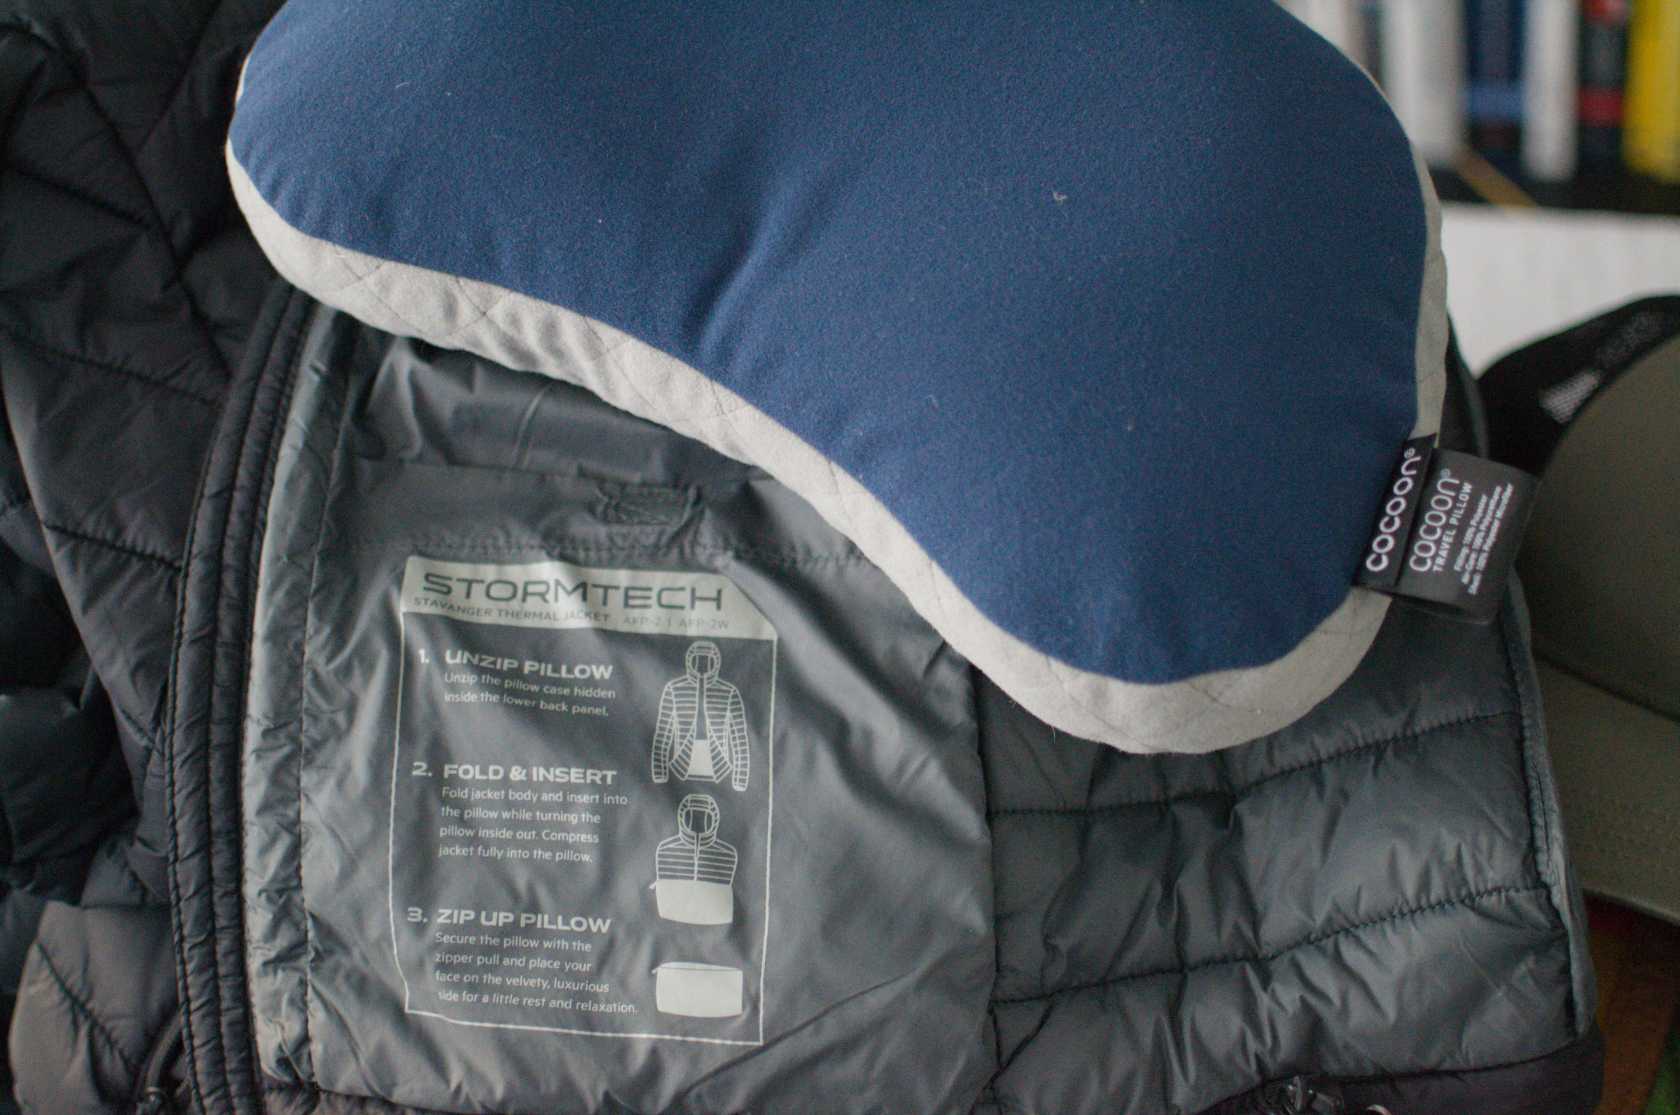
The biggest problem I have with pillows is that they escape at night while I am sleeping. If you use a mummy bag, keep your pillow in place by tucking it into the hood. Some bags have a pillow pocket.
One of the best aspects of inflatable pillows is you can adjust how firm they are on the fly. Start at 75% inflated, and let some out if that is too firm. Fancy inflatable pillows have a fabric liner, but a pillow with a plastic exterior is just fine if you use an extra piece of breathable clothing as a pillow case.
# My Sleep System
I use a silk sleeping bag liner and a goose down 10F / -12C mummy bag. I buy gear made in the United States when I can. My full sleep kit includes the following items:
- Feathered Friends Raven sleeping bag
- Cocoon silk sleeping bag liner
- Air Head down pillow, which I wrap in an extra sweater
- Z Lite sleeping pad (goes on the ground)
- NeoAir sleeping pad (goes on top of the z-pad)
- Eargasm ear plugs
I have been happy with my sleep setup in temperatures ranging from 70F / 21C to freezing. In cold weather, 45F / 7C and below, I wear a long-sleeve merino base layer, neck gaiter, and cap. Regardless of weather, I change into sleep clothes or remove any outer layer items before I get into my sleeping bag to help keep it clean.
In warm weather I go to sleep in my liner only and get into the bag around midnight when the temperature drops. In high temperature areas like Joshua Tree, where it can be 85F / 30C at night, any sleeping bag is too warm. I use my sleeping pad with a cotton blanket and lightweight down quilt.
My down bag gets cold if it gets wet. This often happens near my feet when the bag touches the sides of my tent and absorbs condensation. If weather is fair during the day, I unzip my bag and drape it over my tent to dry and air out for about an hour.
# Test Your Sleep System!
Test your sleep system before you use it on an adventure. The best place to test everything is in the back yard (yours or a friend's).
It's easier to figure out how to set up your gear when you are in a low-stakes environment with access to light and internet. If you get cold you can grab an extra blanket from inside. If your sleep arrangement really isn't working you can migrate inside and troubleshoot later.
The two most common issues people face are being too cold or being uncomfortable sleeping on the ground. But there are many other things you might learn, like realizing you can't inflate your pad, or wanting pajama pants to reduce sweat, or needing a different pillow, or needing ear plugs, or wanting coupler sheets for sleeping with a partner.
Good sleep will help you enjoy your time outdoors. Have fun out there!
-Chris